To use the batch check scanner TS240 on Windows 10, Paywire Receiver must be installed. Please refer to the section:
Installation of Paywire Receiver to install and config.
The payment type Remote Check Batch allows users to scan checks. To create a Remote Check Batch payment the user must click Payment from the main menu, then click Make Payment and lastly ensure that Remote Check is selected within the Payment Type dropdown menu. All required fields are marked with a red asterisks, the user must ensure that all required fields are entered and valid before clicking Process Payment. What fields are required will depend on the currently selected merchant and that merchant's type. Only merchant types C and D can process Remote Check Batch payments. Merchant types differ on what information is needed within the sales data portion of the Remote Check Batch payment form. Because the difference is located only the in the sales data portion, the the below section covering Sales Data has been broken down into for two parts
Type C, and
Type D,
Sales Data
A type C merchant must enter "Batch ID" and "Control Amount" before placing checks within the scanning device and clicking "Scan Checks".
A type D merchant must enter Batch ID" and "Control Amount" before placing checks within the scanning device and clicking "Scan Checks". Type D merchants have an additional field, SAP Invoice, which allows the user to include invoice information. By default the SAP Invoice dropdown value is "No SAP Invoices". If the user selects "SAP Invoices", columns Grant Number and Principal Investigator will be added to the scanned checks table.
Scanning Checks
After entering the needed sales data the user can prepare the checks for the check scanner. The user should be aware that the TellerScan240 can process a maximum of 50 checks at once, additionally; the user must ensure that the checks are placed in physical size order (smallest in front to largest in back) otherwise the machine could jam. To scan the checks the user must click "Scan Checks", after clicking "Scan Checks", a pop up will be displayed, click "Scan" within the popup window to begin scanning. The Information from the scanned checks will populate the table. After the table has been populated the user must manually enter any data not populated i.e Amount, First Name, Last Name, Grant Number and Principal Investigator. The scanner does not capture the correct information 100% of the time it is the users responsibility to ensure that the captured information is correct. After the initial scanning of checks the user may scan additional checks by clicking "Add Checks". Each check can be allotted to one or more SAP revenue accounts; to add SAP information to a check the user must click the expansion button (plus symbol) located in the far left column of each check. The user must ensure that the sum of the SAP Amount fields for each check equal the check amount.


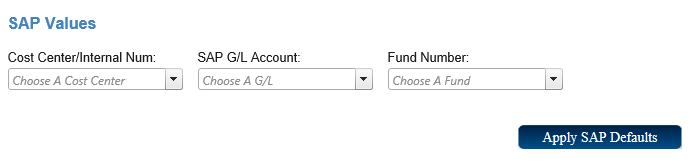
SAP Values
If scanned checks belong to the same SAP revenue account the user may apply the same SAP information to multiple checks with out having to type the inforamtiuon repeatedly for individual checks. To add the same SAP information to multiple checks the user must type the SAP information into the fields located within the SAP Values section, then click the check box for each check that belongs to the same SAP revenue account, lastly click "Apply SAP Defaults" . After the user has clicked apply The columns Cost Center, SAP G/L and Fund Number of the checks that were checked will be populated. The user must still
The user must ensure that the amounts listed within each checks SAP amount fields equal the amount entered for each check.
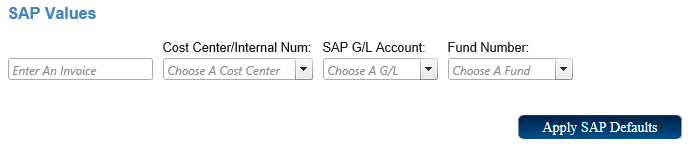
If the merchant type is D and the user has elected to include a SAP Invoice a field will be added to the left of the SAP values Section. The field will allowed the user to enter an invoice identifier.
Processing the Transaction
When you have finished filling in all the required fields and any additional fields you choose to fill in, you can process the transaction. If you decide at this point that you no longer want to process this transaction you can either click "Reset" at the bottom of the screen to reset the form and enter in new information, or you can click "Cancel" to close out the Credit Card Payment screen.
Once you click process, if you missed any required fields you will be prompted to fill in these fields. You will not be able to proceed until all required fields are filled in. Once all the required fields are filled in, you can click "Process Payment."
Transaction Result
After the user has clicked "Process Payment." they will be forwarded to the Remote Check Batch Result, this screen will allow users to view the any information related the the processed checks. The user can click "View all Transactions," which allows the user to view information pertaining to an individual check.
After clicking "View all Transactions", a table will appear that allows the user to select an individual check and view the information related to that check the user must click he "Select" button located at the far left of of any row. Once the user clicks "Select", a screen titled Transaction Details will appear, this screen displays information related to that specific check. The user may choose to view the front or back of a scanned check by clicking "Preview". To email or print a receipt to the selected check the user may click Email A Receipt or Print A Reciept.
If you choose to email a receipt click the "Email A Receipt" button. At the bottom of the screen a field labeled Email Receipt Options will come up. Enter the customers email address into this field and click "Send". A message will appear saying that the receipt was sent.