Recurring Credit Card Billing
Payment Type Recurring Billing Credit allows users to charge customers on a recurring bases for some set amount. To create a Recurring Credit Card Billing payment the user must click Payment from the main menu, then click Make Payment and lastly ensure that Recurring Credit Card Billing is selected within the Payment Type dropdown menu. All required fields are marked with a red asterisks, the user must ensure that all requited fields are entered and valid before clicking Process Payment. What fields are required will depend on the currently selected merchant and that merchant's type. All merchant types can process Recurring Credit Card Billing payments. Merchant types differ on what information is needed within the sales data portion of the Recurring Credit Card Billing payment form. Because the difference is located only the in the sales data portion, the the below section covering Sales Data has been broken down into for four parts
Type A,
Type B,
Type C, and
Type D,
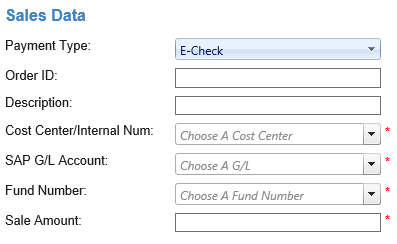
A type A merchant require the following fields within the sales data section to be completed: "Cost Center/ Internal Num", "SAP GL/Account" and "Fund Number". A type A merchant can only enter one SAP revenue account to any one credit card transaction.
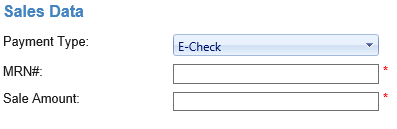
A type B merchant require the MRN# field be competed.
A type C merchant can enter several SAP accounts within a single credit card sale. Because Type C can enter several SAP accounts there are several rows within the Credit Card Sale form allocated for the input of SAP information. The user must ensure that the Amount fields of the SAP revenue accounts sum to the exact value of the Sale Amount field. By default the user only has three available fields to input SAP information, if the user needs to enter more than three SAP accounts he/she can click the blue addition symbol located below the last enter SAP account entered.
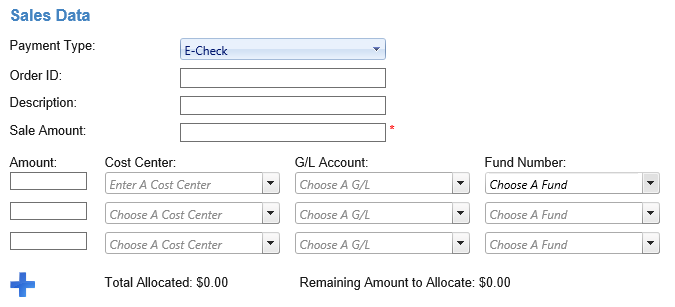
A type D merchant can enter several SAP accounts within a single credit card sale. Because Type D can enter several SAP accounts there are several rows within the Credit Card Sale form allocated for the input of SAP information. The user must ensure that the Amount fields of the SAP revenue accounts sum to the exact value of the Sale Amount field. By default the user only has three available fields to input SAP information, if the user needs to enter more than three SAP accounts he/she can click the blue addition symbol located below the last enter SAP account entered.
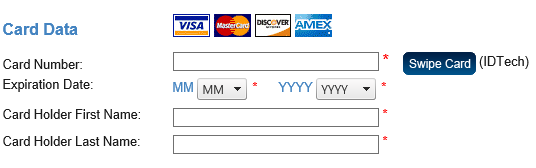
Card Data
The user has the option of manually entering credit card information or the user can click the swipe card option, which allows the user to swipe a credit card and auto populate card information.
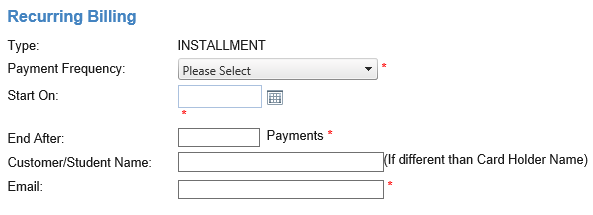
Recurring Billing
Below the "Recurring Billing" header users can enter information describing when the credit card will be charged. The field "Payment Frequency" contains a drop down menu that gives the user three different options: weekly, monthly and yearly. The user has the option of manually entering the start date or clicking the the calendar symbol next to the to the "Start On" field, if clicked a calendar displaying dates will appear. Next the user must enter the number of payments that will be charged to the credit card
.
Once all required fields are entered the user may click "Process Payment" to begin processing payment information. Upon a successful transaction the user will be directed to an Approval Page where he/she may print and/or email a receipt.
Processing the Transaction
When you have finished filling in all the required fields and any additional fields you choose to fill in, you can process the transaction. If you decide at this point that you no longer want to process this transaction you can either click "Reset" at the bottom of the screen to reset the form and enter in new information, or you can click "Cancel" to close out the Credit Card Payment screen.
Once you click process, if you missed any required fields you will be prompted to fill in these fields. You will not be able to proceed until all required fields are filled in. Once all the required fields are filled in, you can click "Process Payment."
Transaction Result
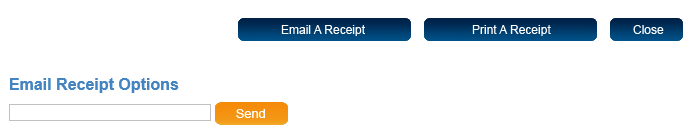
After the user has clicked Process Payment." they will be forwarded to the Transaction Result, which will either be an approval or decline. This screen also allows you to print or email a receipt.
If you choose to email a receipt click the "Email A Receipt" button. At the bottom of the screen a field labeled Email Receipt Options will come up. Enter the customers email address into this field and click "Send". A message will appear saying that the receipt was sent.
If you choose to print a receipt click the "Print A Receipt" button. The receipt will open in a new window and you can then print the receipt. Click "Close" to close the window when the receipt has printed. When you are finished with the transaction click "Close" at the bottom of the screen, and you will return to the payment page.